Most residential solar installations benefit from using an existing residential structure to support the solar system rather than creating a structure to support the solar modules. This has some inherent benefits in that the structure can generally support most flush mount solar systems (depending on local Authority Having Jurisdiction [AHJ] requirements). However, there are some items to be mindful of when installing on an inhabited structure.
Lag screw engagement
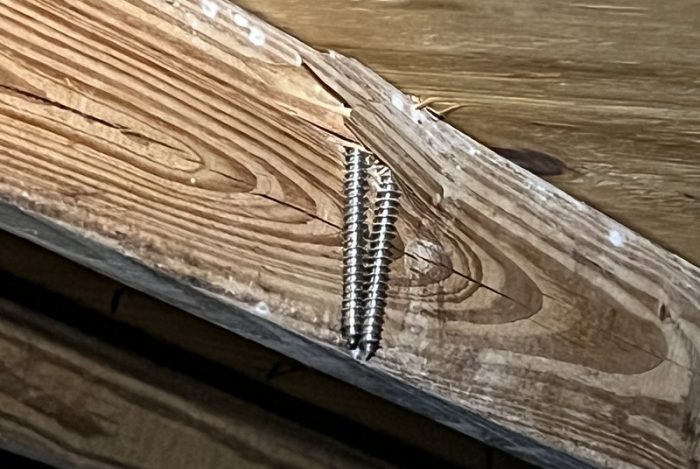
The most common method of anchoring residential solar to an existing residential structure is with a 5/16 in. lag screw. So much so that it is commonly a part of many AHJ Solar Array checklists. Proper install of these lag screws is an important part of the system, but that does not mean it is always easy.
Lag screws develop their capacities through thread engagement into wood framing members, commonly roof rafters or trusses. Also required is proper edge distance of the lag screw from the edge of a member. This is to ensure attachment capacities can be met and so that damage to the structural members is minimized.

Determining the center of the framing element below decking can be challenging. Making sure that the lag screw is hitting the center of the framing member below and not encroaching on the edge of the member is vital. Encroachment on the edge can lead to shiners or blowout of the framing member reducing or eliminating the structural capacity of the attachment.
Care needs to be taken to follow manufacturer installation specifications to ensure proper installation.
Proper clamp installation
In engineering, we tend to learn a fair amount from failures or extreme events. In 2017, Puerto Rico was impacted by two hurricanes, Irma and Maria. The Federal Emergency Management Agency (FEMA) sent out their Mitigation Assessment Team (MAT) to assess structures and systems. The MAT created a report that highlighted some impacts to solar PV on the island.
One of the items covered in the report indicated that residential failures of the PV panels occurred at the connections to the racking system. This may be commonly known as a mid clamp or end clamp. Properly installing the system connections or clamps allows the solar system to behave and respond to load as intended. Loose or improperly installed connections do not allow for proper load path or transfer with the solar system and can lead to unintended load concentrations that can produce failures.

Care should always be taken to adhere to the installation specifications from the manufacturer. Ensuring proper locations of connectors and torquing of connected elements are vital steps for proper system performance and longevity.
Waterproofing attachment points
Waterproofing or flashing is vital for the structure. The roofs of homes are built as a system, and roof leaks are one of the main reasons for callbacks in the residential solar industry. Roof leaks at the array attachment points are one item to consider. Others include properly sealing attachment points for safety hardware, conduit runs, as well as any pilot holes used during the installation.
There are many different methods of waterproofing or flashing that are used by racking manufacturers. Care needs to be taken to follow manufacturer installation guidelines to ensure proper installation and give yourself and the owner the peace of mind that the install can perform (leak free) as intended. Consult with a local roofing expert to ensure proper product and techniques are used.
Module selection and design loads
Module manufacturers generally provide two types of loads in their documentation: test load and design loads.
Test loads are the loads that the module is tested to, whereas the design loads are the loads to be used in comparing the module against the required design loads. The ratio, test loads/design loads, is commonly referred to as the Factor of Safety (FOS).
Be sure to consider the combinations of loads that may interact with the modules and solar system. Checking only wind load or snow load may not produce the worst-case design load combination, and perhaps some combination of wind load and snow load along with the module dead load needs to be considered.
Failure to consider proper design load combinations may result in non-compliant installations, voiding manufacturer warranties and lead to underperforming PV modules.
As modules move to larger formats/sizes to save material cost, paying attention to design loads becomes more important because larger modules can have lower allowable load capacities. Consult with your module manufacturer to be sure you are installing a module that can withstand the local AHJ required design loads.
Jason Brown, PE, SE, M.ASCE is a senior manager of civil engineering and an officer at Sunrun. Jason is licensed Professional Civil/Structural Engineer in 17 states, a member of the ASCE 7-22 Wind Load Sub-Committee and a guest speaker at NABCEP Continuing Education Conference.
— Solar Builder magazine
Leave a Reply
You must be logged in to post a comment.